LED VIDEO WALL BUYER'S GUIDE

BUYERS GUILD
Choosing the Perfect Size
LED video walls can be built in almost any size by connecting individual panels together. However, to display standard video content without black bars or distortion, most installations are designed using a 16:9 widescreen aspect ratio—the same shape used by modern TVs and most presentation software. Most indoor LED panels measure 500 × 500 mm (19.7” × 19.7”). Because the panels are metric, the finished dimensions often convert to measurements with decimal inches or feet.
The easiest place to start is by measuring the width of your existing projector screen or the wall where your new display will be installed. Once the width is determined, the height can be automatically set to maintain the proper 16:9 aspect ratio.
Tip: It’s usually better to install the largest display your space and budget comfortably allow. Most churches that upgrade to LED walls say they wish they had gone slightly larger rather than smaller.
6 Most Common Video Wall Sizes

BOLD RESOLUTION
What is Pixel Pitch?
Pixel pitch is the distance between the center of one LED pixel and the next, measured in millimeters. It’s usually written as a capital “P” followed by a number, such as P1.5, P1.9, P2.5, P2.6, P2.9, or P3.9. The smaller the number, the closer the pixels are together, creating a sharper image for viewers who are seated close to the screen. Larger pixel pitches work well when the audience is farther away and can often provide a more economical solution.
For most churches replacing a projector screen or installing an LED wall behind the worship team, P2.6 is the most popular choice because it offers an excellent balance of image quality, viewing distance, and value. Choosing the right pixel pitch depends on how close your audience will be to the screen, which is why viewing distance is one of the most important factors when selecting an LED video wall.

Tip: Smaller "P" Number = Sharper Image Up Close
WAYS TO INSTALL
Installation Options
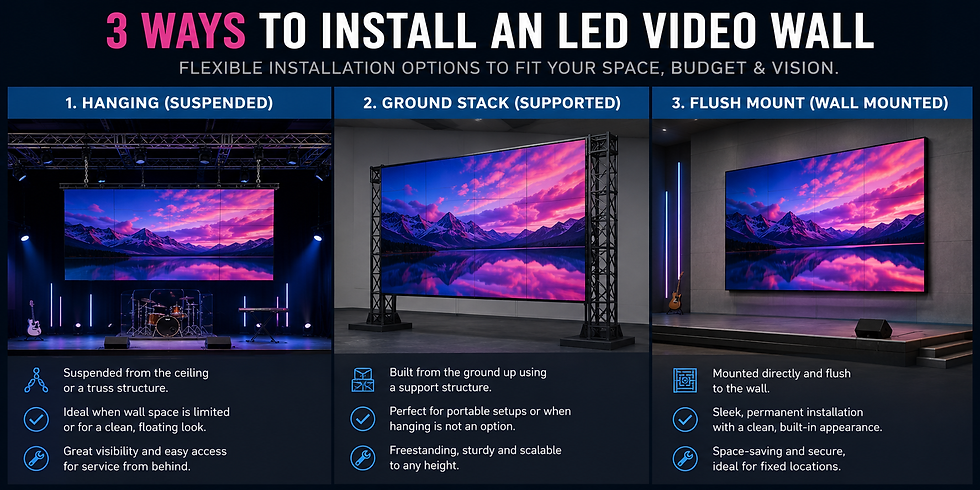
LED video walls can be installed in three primary ways, and the best choice depends on your space, budget, and long-term goals.
1. Suspended (Hanging) – The most common and generally the most cost-effective option is to suspend the video wall from the ceiling or a support structure such as a truss. This creates a clean, floating appearance, keeps the floor clear, and works well in most churches, auditoriums, and event spaces. It’s an excellent choice when the building structure can support the weight of the display.
2. Ground Stack – A ground-stacked video wall is built from the floor up using a freestanding support system. This method is ideal when ceiling mounting isn’t possible or when a portable, temporary, or movable installation is needed. Ground-stacked systems are popular for touring productions, events, and multipurpose spaces because they can be assembled and relocated with relative ease.
3. Flush Mount – A flush-mounted video wall is attached directly to a wall using a specialized mounting system, creating a sleek, built-in appearance with minimal gap between the display and the wall. This is the preferred solution for permanent installations in church sanctuaries, lobbies, conference rooms, and businesses where a clean, architectural look is desired.